Streamline your IaC with a single-stack deployment powered by AWS CDK EKS-Blueprints.
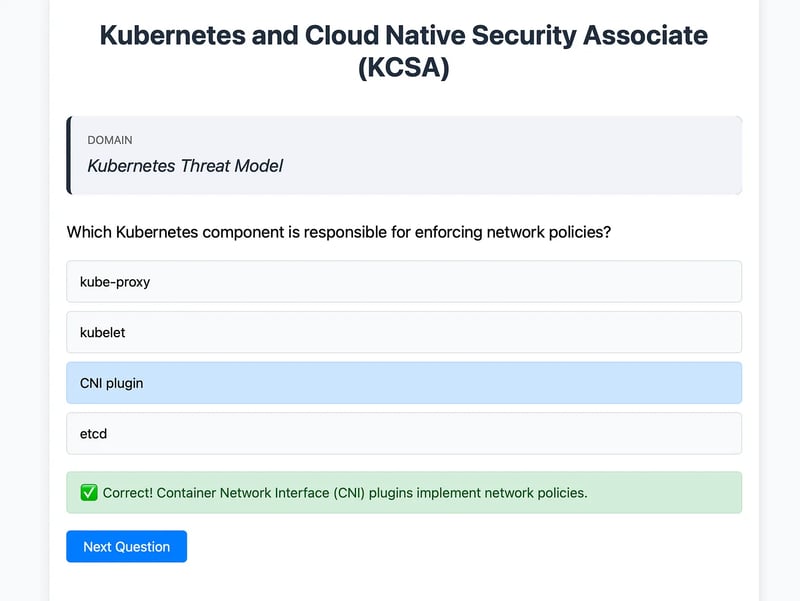
In this guide, we will build a Kubernetes and Cloud Security Associate (KCSA) Exam Simulator using Amazon EKS with CDK Blueprints. We will be leveraging Kubernetes 1.32 resources (Deployment, Service, Ingress) on EKS to create an exam simulator containerized application. In the docker image, we use Flask that serves random questions from a JSON file through REST APIs, with a simple HTML/JavaScript frontend to display and handle user interactions as shown in the below screenshot.
Note: This is a practice tool for KCSA exam and designed to help you gain hands-on experience with Kubernetes manifests on Amazon EKS and using Infrastructure-as-code approach with AWS CDK and EKS Blueprints. It is not an official KCSA exam simulator.
If you want a more realistic practice test on KCSA, you can try out my KCSA Udemy Practice tests with a FREE coupon for a limited time:
Course: Kubernetes and Cloud Native Security Associate (KCSA)
Coupon Code: 59C0A8C14E66552F3137
Pre-requisites for our App
- AWS Account: You’ll need an AWS account to access and use AWS services. If you don’t have an account, you can create one at https://aws.amazon.com/
- AWS CLI & CDK: Install and configure the AWS CLI using the AWS CLI Installation Guide. Get started with the AWS CDK by following the AWS CDK Getting Started guide.
- Docker: Install Docker by following the instructions on Get Docker.
- Environment Variables: Set up necessary environment variables for EKS Blueprints stack (e.g.,
MASTERS_ROLE_ARN, USER_ROLE_ARN, KEY_PAIR_NAME). - Other tools: kubectl, eksctl (optional for this demo), git, Visual Studio Code (or your favourite Editor), NodeJS
Refer the guide here on EKS Blueprints CDK Project Setup, since the latest supported aws-cdk version v2.173.4 for EKS Blueprints might change from time to time.
Implementation
The CDK code for this solution architecture is available in our GitHub repository. To begin, you can clone the repository to your local terminal and install the necessary npm packages with these commands:
git clone https://github.com/awsdataarchitect/eks-kcsa-cdk.git && cd eks-kcsa-cdk
npm i
The parameters for the stack can be customized as shown below:
export MASTERS_ROLE_ARN=arn:aws:iam::1234567890:role/mastersRoleArn
export USER_ROLE_ARN=arn:aws:iam::1234567890:role/userRoleArn
export KEY_PAIR_NAME=your-key-pair-name
MASTERS_ROLE_ARN is used for the AWS Console Access to EKS Cluster components
USER_ROLE_ARN is used for kubectl or eksctl (optional) command line interaction with EKS cluster components
Note that the role ARNs can’t include a IAM path in bold such as
arn:aws:iam::1234567890:role/aws-reserved/sso.amazonaws.com/mastersRoleArn
The format of the ARNs must follow this naming convention:
arn:aws:iam::1234567890:role/mastersRoleArn
Hence aws-reserved/sso.amazonaws.com needs to be removed from the path if applicable. This is especially the case if you are using an AWS-SSO based IAM role for managing your EKS cluster.
EKS CDK Stack Overview (eks-kcsa-cdk.ts)
1. Creating the VPC
We create a VPC with public subnets that will host our EKS cluster and allow Internet traffic to our ALB fronting the NodePort service via the AWS Load Balancer Controller and the ingress Kubernetes resource.
const vpc = new ec2.Vpc(this, 'EksVpc', {
  maxAzs: 2,
  subnetConfiguration: [{
    name: 'PublicSubnet',
    subnetType: ec2.SubnetType.PUBLIC,
  }],
});
2. Building and Pushing the Docker Image
Next, we containerize our exam simulator application. The entire docker code using Flask backend along with the sample json formatted questions is located here. The docker image is built locally and pushed to Amazon ECR using the DockerImageAsset construct.
const appImageAsset = new DockerImageAsset(this, 'kcsa-image', {
  directory: './lib/docker',
  platform: Platform.LINUX_AMD64,
});
Note: Because our worker node is x86-based, it’s essential to build our Docker image for x86. To do so, specify platform: Platform.LINUX_AMD64 in the DockerImageAsset construct above. This is particularly important when developing on a Mac—failing to set the platform correctly can result in errors such as /usr/local/bin/python: exec format error in the kubectl logs.
Additionally, you can enforce the target architecture within your Dockerfile by using the directive:
FROM --platform=linux/amd64 python:3.9-slim
3. Defining the EKS Cluster Provider
We now configure the EKS cluster using AWS CDK Blueprints. This snippet sets up a cluster provider with managed node groups using a custom launch template.
const launchTemplate = new ec2.LaunchTemplate(this, 'LaunchTemplate', {
  keyName: process.env.KEY_PAIR_NAME,
});

const clusterProvider = new blueprints.GenericClusterProvider({
  version: eks.KubernetesVersion.of('1.32'),
  tags: { 'Name': 'kcsa-cluster' },
  vpc, // Reuse the VPC defined earlier.
  mastersRole: blueprints.getResource(context => {
    return iam.Role.fromRoleArn(context.scope, 'MastersRole', mastersRoleArn, {
      mutable: true,
    });
  }),
  managedNodeGroups: [{
    id: 'mng1-launchtemplate',
    instanceTypes: [new ec2.InstanceType(workerSpotInstanceType)],
    amiType: eks.NodegroupAmiType.AL2_X86_64,
    nodeGroupCapacityType: eks.CapacityType.SPOT,
    desiredSize: 1,
    minSize: 0,
    maxSize: 1,
    nodeGroupSubnets: { subnetType: ec2.SubnetType.PUBLIC },
    launchTemplateSpec: {
      id: launchTemplate.launchTemplateId || 'id',
      version: launchTemplate.latestVersionNumber,
    },
  }],
  privateCluster: false,
  vpcSubnets: [{ subnetType: ec2.SubnetType.PUBLIC }],
});
4. Building the EKS Cluster and Adding Teams
Next, we bring it all together using the blueprint builder. We assign a platform team, add necessary add-ons (like the AWS Load Balancer Controller and VPC CNI), and create the cluster.
const platformTeam = new blueprints.PlatformTeam({
  name: 'platform-admin',
  userRoleArn: userRoleArn,
});

const cluster = blueprints.EksBlueprint.builder()
  .clusterProvider(clusterProvider)
  .resourceProvider(blueprints.GlobalResources.Vpc, new blueprints.DirectVpcProvider(vpc))
  .teams(platformTeam)
  .addOns(...addOns)
  // IMPORTANT: Explicitly set the account and region to prevent cross-stack reference errors.
  .account(process.env.CDK_DEFAULT_ACCOUNT)
  .region(process.env.CDK_DEFAULT_REGION)
  .build(this, 'eks-cluster');
Note: Setting the account and region in the builder is crucial because you’re referencing the vpc from the parent stack. Without this, you might encounter the error:
“Cross stack references are only supported for stacks deployed to the same account or between nested stacks and their parent stack.”
5. Deploying Kubernetes Manifests: Deployment, Service, and Ingress
With our cluster ready, it’s time to deploy the application. We define a Deployment for our exam simulator, a Service to expose it, and an Ingress to route traffic via an AWS ALB.
const appLabel = { app: 'kcsa-app' };
const cfnCluster = cluster.getClusterInfo().cluster;
cfnCluster.addManifest('KcsaDeployment', {
  apiVersion: 'apps/v1',
  kind: 'Deployment',
  metadata: { name: 'kcsa-backend' },
  spec: {
    replicas: 1,
    selector: { matchLabels: appLabel },
    template: {
      metadata: { labels: appLabel },
      spec: {
        containers: [{
          name: 'kcsa-container',
          image: appImageAsset.imageUri,
          ports: [{ containerPort: 5001 }],
        }],
      },
    },
  },
});
cfnCluster.addManifest('KcsaService', {
  apiVersion: 'v1',
  kind: 'Service',
  metadata: { name: 'kcsa-service' },
  spec: {
    type: 'NodePort',
    selector: appLabel,
    ports: [{ port: 80, targetPort: 5001 }],
  },
});
cfnCluster.addManifest('EksIngress', {
  apiVersion: 'networking.k8s.io/v1',
  kind: 'Ingress',
  metadata: {
    name: 'kcsa-ingress',
    namespace: 'default',
    annotations: {
      'alb.ingress.kubernetes.io/scheme': 'internet-facing',
    },
  },
  spec: {
    ingressClassName: 'alb',
    rules: [
      {
        http: {
          paths: [
            {
              path: '/',
              pathType: 'Prefix',
              backend: {
                service: {
                  name: 'kcsa-service',
                  port: { number: 80 },
                },
              },
            },
          ],
        },
      },
    ],
  },
});
Note: The blueprints.EksBlueprint.builder() API does offer higher-level (L2) constructs to deploy add-ons like Kubernetes manifests. However, in our example, we show you how to leverage the low-level (L1) CloudFormation escape hatch to deploy Kubernetes manifests directly. This is done by retrieving the underlying CloudFormation resource for the EKS cluster using cluster.getClusterInfo().cluster and then calling its addManifest method. This approach provides granular control over the manifest deployment, bypassing the abstractions provided by L2 constructs when you need to define resources explicitly using CloudFormation.
6. Deploying Your Stack with CDK
Before deploying, ensure your environment is bootstrapped with the necessary resources (S3 buckets, IAM roles, etc.) using the following command:
cdk bootstrap
Note on CDK Bootstrapping:
Bootstrapping is required only when you deploy CDK for the first time on an AWS account. If you encounter errors like the one below during deployment, it indicates that your bootstrap stack is outdated due to changes in AWS’s bootstrap configuration:
31885 (cli): Bootstrap stack outdated error
The bootstrap stack in aws://123456789012/us-east-1 is outdated.
We recommend at least version 21, distributed with CDK CLI 2.149.0 or higher.
To fix this, rebootstrap your environment with the following command:
cdk bootstrap aws://123456789012/us-east-1
For additional details, check out the CDK CLI Notices and the GitHub issue #31885. If you prefer not to see this notice again, acknowledge it using:
cdk acknowledge 31885
Once bootstrapped, deploy your stack:
cdk deploy
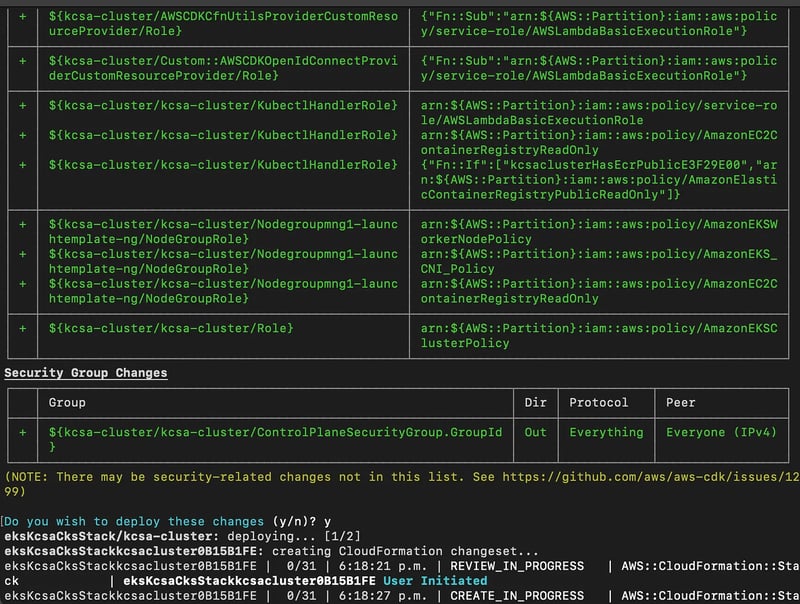
During deployment, CDK synthesizes your CloudFormation templates and provisions all resources, including the VPC, EKS cluster, and Kubernetes manifests.
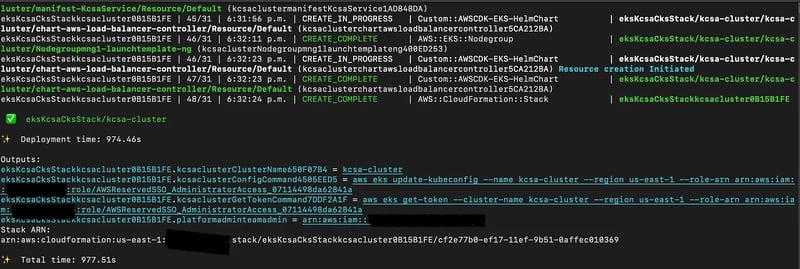
After deployment, remember to update your local kubeconfig configuration simply by referring to the commands generated in the above cdk deploy output.
aws eks update-kubeconfig --name kcsa-cluster --region us-east-1
aws eks get-token --cluster-name kcsa-cluster --region us-east-1
Next, grab the ALB’s DNS name from the ingress like this:
kubectl get ingress
You should see output similar to this:
NAME CLASS HOSTS ADDRESS PORTS AGE
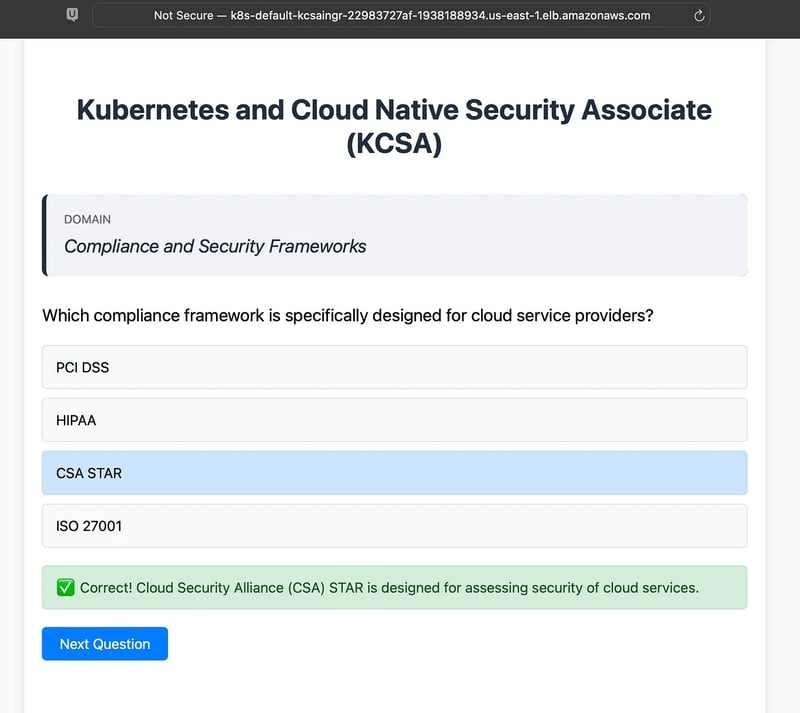
kcsa-ingress alb * k8s-default-kcsaingr-22983727af-1938188934.us-east-1.elb.amazonaws.com 80 72m
Open this URL in your browser, and you’ll see your KCSA Exam Simulator up and running!
What’s New in Kubernetes 1.32
Kubernetes version 1.32 introduces several improvements including stable support for custom resource field selectors and auto removal of persistent volume claims created by stateful sets. This release removes v1beta3 API version of FlowSchema and PriorityLevelConfiguration. To learn more about the changes in Kubernetes version 1.32, see the documentation and the Kubernetes project release notes.
Note: This is the last version for which Amazon EKS will release Amazon Linux 2 (AL2) AMIs. From v1.33 onwards, Amazon EKS will continue to release Amazon Linux 2023 (AL2023) and Bottlerocket-based AMIs.
Cleanup
When you’re finished exploring your KCSA Exam Simulator, it’s important to clean up both your Kubernetes resources and your AWS infrastructure to avoid incurring unnecessary costs.
Step 1: Delete Kubernetes Resources
Remove the deployed Kubernetes resources (Deployment, Service, and Ingress) from your cluster by running the following commands:
kubectl delete deployment kcsa-backend
kubectl delete service kcsa-service
kubectl delete ingress kcsa-ingress
This ensures that all associated pods and endpoints are terminated gracefully, preventing potential timeouts or lingering pending requests that could delay resource cleanup with cdk destroy commands in the next step.
Step 2: Destroy the EKS Cluster
After cleaning up the Kubernetes resources, you can remove the EKS cluster using AWS CDK. First, tear down the cluster by executing:
cdk destroy eksKcsaCksStack/kcsa-cluster
Once the cluster is removed, tear down the entire stack with:
cdk destroy eksKcsaCksStack
This orderly cleanup ensures that all resources are properly deleted and your environment stays cost-efficient.
Conclusion
By leveraging AWS CDK EKS-Blueprints and the latest Kubernetes 1.32, you can rapidly deploy a practice app for KCSA Exam on AWS EKS using an X86 docker image. With a single command — cdk bootstrap followed by cdk deploy—you set up a modern, secure, and scalable environment. Once deployed, simply use the ALB URL provided (or check via kubectl get ingress) to access your exam simulator.
I hope you enjoyed this walkthrough. As always, feel free to leave comments or reach out with questions. Now, Go build!